5 simple steps to execute unit testing using NUNIT
Introduction and Goal
Unit testing is validation and verificationmethodology where the developers test the individual units of source code. In
this tutorial we will try to understand how we can do unit testing using NUNIT
framework. This tutorial we will try to understand the 5 important steps to do
unit testing using NUNIT.
Please feel free to download by 400 .NET interview question free EBook from
http://www.questpond.com which
covers sections like basic .NET, Design patterns,3.5,SQL Server,UML and lot of
other sections.The example which we will test Below is a simple class ‘clsInvoiceCalculation’
which calculates total cost by taking per product cost and number of products as
input.public class clsInvoiceCalculation
{
public int CalculateCost(int intPerProductCost, int intNumberOfProducts)
{
return intPerProductCost * intNumberOfProducts;
}
}
Let’s say we want to execute the below test
case on the above class using NUNIT.
Per product cost | Number of products | Expected output |
| 10 | 20 | 200 ( test case passed) |
The 5 basic steps to execute the unit test using NUNIT
Step 1:- The first step is to downloadto the NUNIT software from
http://nunit.org/index.php?p=download
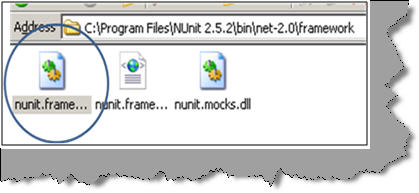
Step 2:- Create a new C# class project and add reference to “C:\Program
Files\NUnit 2.5.2\bin\net-2.0\framework\nunit.framework.dll”. We also need to
add reference to the class project which we are testing i.e. the invoice
project.
Step 3:- Add reference to the NUNIT and
your invoice project in your code.
using NUnit.Framework;
using Invoice;
Step 4 :- We need to create a simple
class with ‘TestFixture’ as attribute. We then to create a method attributed
with ‘Test’ which will have our test.
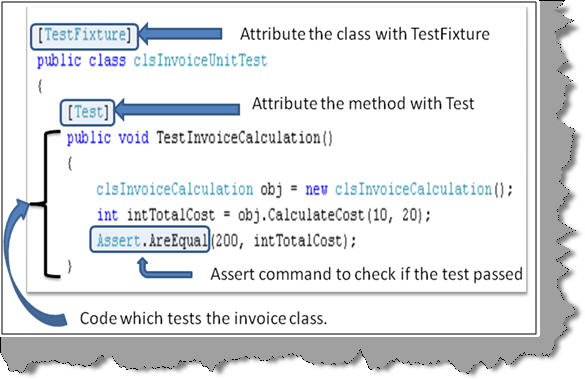
You can see in the above figure how the
‘TestInvoiceCalculation’ method creates an object of ‘clsInvoiceCalculation’ ,
passes the values and checks if the returned values have the expected results.
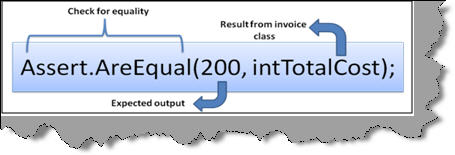
‘Assert’ command is used to check if the expected output and the results return
match.
Step 5:- Once we are finished with our
test case we need to compile the same to create a DLL. Once the DLL compilation
is done go to program files – nunit and click on nunit. Now the nunit user
interface will open. Click on file – open project and select your test DLL.
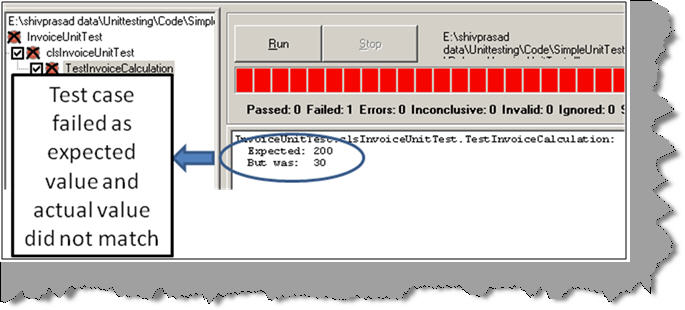
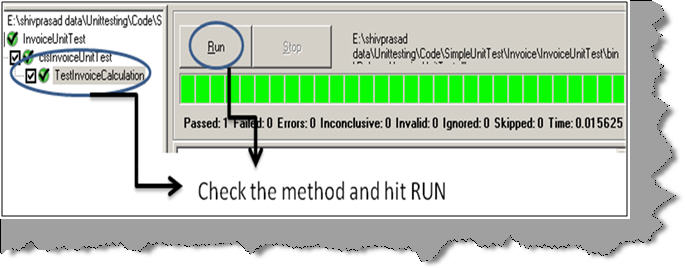
Once you select your DLL you will get a screen as shown below. On the right hand
side you can see your test class with test function which has the test case.
Check the test function and hit run. Now if the test case passes you will see a
full green color or else you will see a red color with details of why the test
case fails.
Screenshot when the test case fails.